

How To Repair A Cabinet Coming Away From The Wall
Habitation Repair: How to Fix Kitchen Cabinets
Quick solutions to the well-nigh common cabinet problems
Introduction
Kitchen cabinets work hard, and all that opening and closing creates a multifariousness of problems. About are cheap and easy to fix, then take a 24-hour interval and plow through them—it'll be similar having a new kitchen.
Tools Required
Materials Required
- ane/4-in. plywood
- 1x2
- 3/4-in. plywood
- Back plates for knobs
- Brad nails
- Door bumpers
- Drawer slides
- Dry lubricant
- Magnet catch
- Removable thread adhesive
- Roller catches
- Toothpicks
- Wood cleaner
- Wood make full stick
- Wood glue
For more on learning how to build your own custom kitchen cabinets without the custom price – check out How to Build Kitchen Cabinets taught by Steve Maxwell!
Project step-by-footstep (xv)
Step 1
Build a Shelf That Won't Sag

Don't bother replacing a sagging shelf with another 1/2-in.-thick shelf or it'll cease upward sagging too. Instead, cut a new shelf from 3/iv-in. plywood. Make it the aforementioned length and i-1/2 in. narrower (and then you lot can add together rails). Then glue and brad nail (or clamp) 1x2 track along the front and back of the shelf, flush with the ends. The track give the shelf additional back up so it won't sag, even if yous load information technology up with heavy cookware. Utilize a polyurethane (or other) finish to lucifer your other shelves.
Pace ii
Replace Worn-Out Drawer Slides
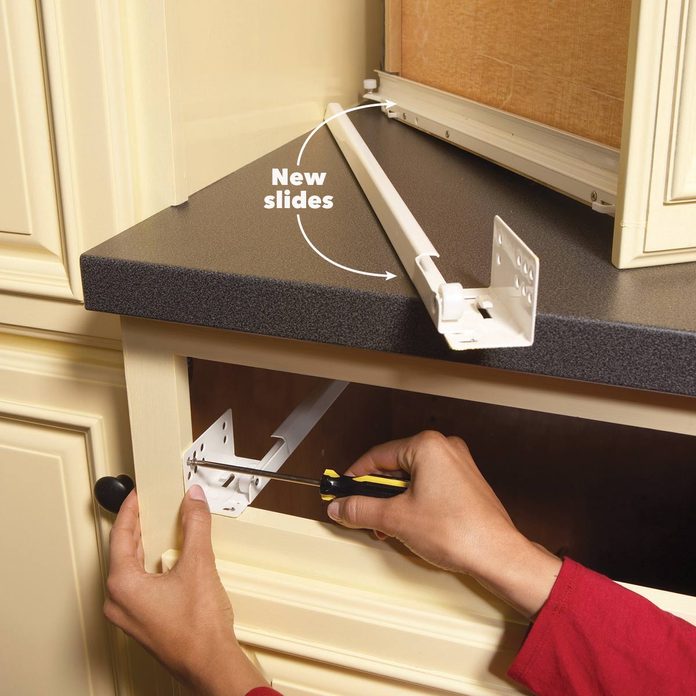
Lubricants won't fix damaged drawer slides. They take to be replaced. This is a common problem on silverware drawers and other drawers that conduct a lot of weight. Buy new slides that are the same, or well-nigh the aforementioned, as your old ones. So it's only a matter of swapping them out. You'll find a limited selection of drawer slides at home centers, but there are dozens of online sources. These sites also sell the plastic mounting sockets that attach to the back of the chiffonier to concur the slides in place.
![]()
Step 3
Arrange Euro Hinges
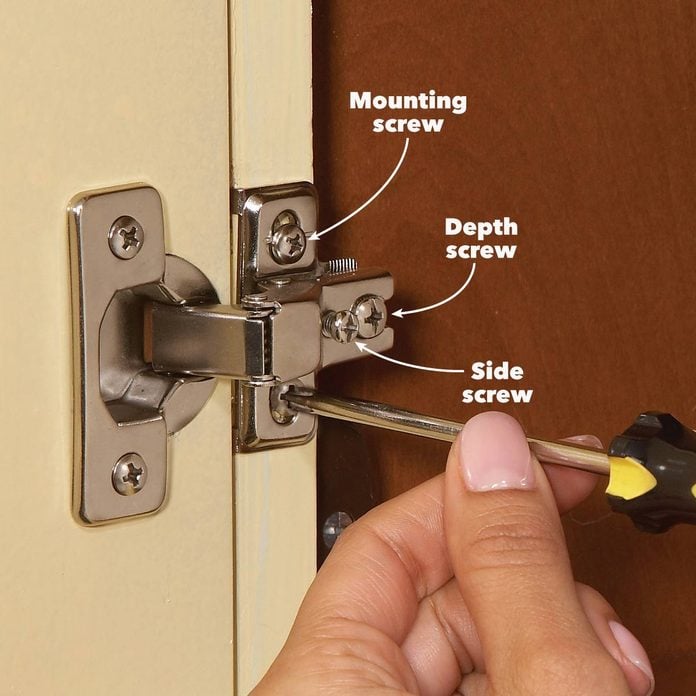
Adjusting cabinet doors with European hinges is as easy as turning a screw or two. Hinges similar this i adjust in three directions; others suit in 2. If your door is crooked—not square with the cabinet—fix that first, then raise or lower it to the same height as next doors.
For crooked doors, adjust the side spiral on ane hinge, which moves the door from side to side. It's a trial-and-fault procedure. Make a pocket-sized adjustment, and then shut the door to check its position. If the door is college or lower than adjacent doors, loosen the mounting screws on both hinges, enhance or lower the door, then tighten the screws. Identify a straightedge across the door top or bottom to make certain information technology's level with neighboring doors.
If the door sticks out too far from the cabinet or the hinge side brushes against the cabinet when you open the door, adjust the depth screw. Some hinges motility the door every bit you plough the depth screw; others crave you to tap the door in or out and then tighten the screw.
Door adjustments aren't as piece of cake if you have traditional hinges. If your doors are sagging, first try tightening the screws. If the hinges are bent, replace them if y'all can find a match.
Step 4
Silence Banging Doors with Bumpers
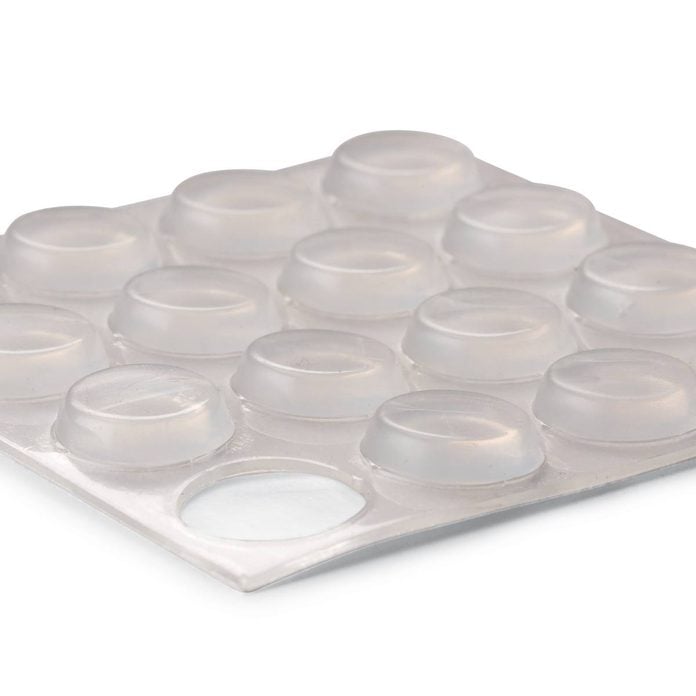
Doors and drawers slam loudly when wood smacks against woods. That's why most accept "bumpers" near the interior corners to absorber the touch on and reduce the noise. But the bumpers sometimes fall off (or kids choice them off). Go new ones at habitation centers. Peel off the backing and stick the bumpers in place. They're bachelor clear or with felt, and in different thicknesses. Apply bumpers the same thickness every bit those on adjacent doors.
Step 5
Fill up In Stripped Screw Holes
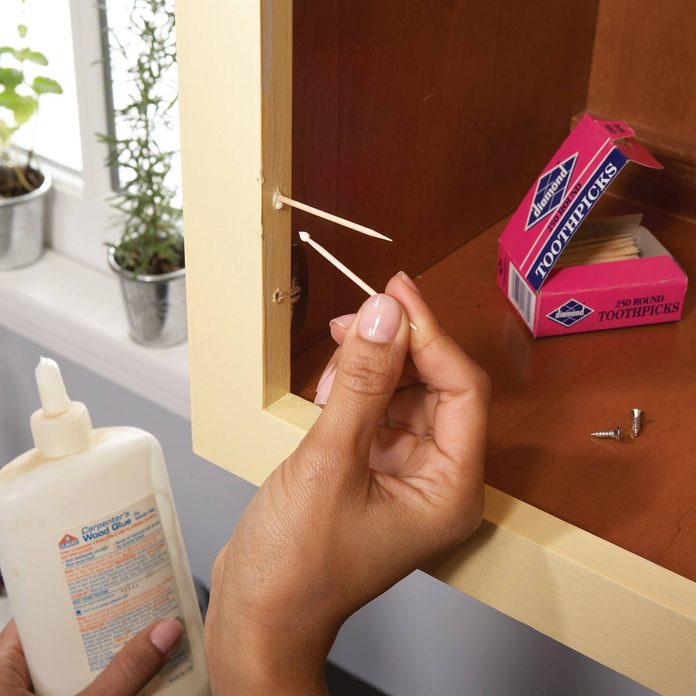
When the screws in your hinges or drawer slides plough but don't tighten, the screw pigsty is stripped. That can prevent doors and drawers from closing properly. Gear up the trouble with glue and toothpicks. Start by removing the hardware. Then use a drop of wood glue to the ends of toothpicks and cram every bit many as will fit into the hole (maybe just two or three). Wipe away whatever glue that drips out. Let the glue dry out, and so use a utility pocketknife to cut the toothpicks affluent with the cabinet or drawer. Reinstall the hardware, driving the screw through the filled hole.
Footstep 6
Beef Up Wimpy Drawer Bottoms
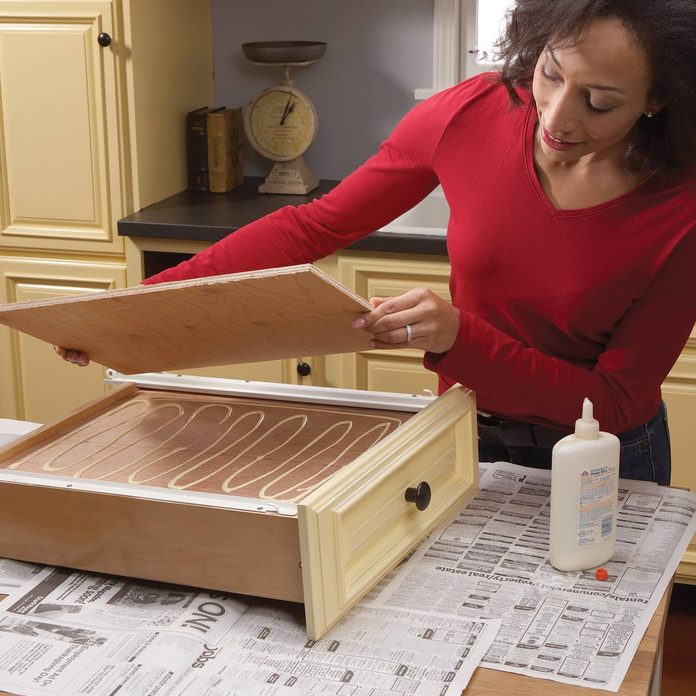
The sparse plywood used for drawer bottoms sometimes gets wavy. Stiffen up the bottoms with 1/4-in. or iii/8-in. plywood. Cutting the plywood to fit over the drawer bottom, leaving about a one/4-in. gap on each side. Use forest glue on the drawer bottom and set the plywood over information technology. Set a gallon or two of paint over the plywood to hold it in place until the glue dries.
Footstep 7
Glue Loose Knobs
One time knobs fall off your cabinets, twisting them back on won't solve the problem. They'll just proceed coming loose. Use a dab of thread agglutinative to keep them in place (Loctite 242, blueish, is one brand that will concord the knob in identify without gluing information technology permanently; it'south sold at hardware stores and home centers). Apply the agglutinative to the spiral, then attach the knob. If yous decide to supersede the knob subsequently, don't worry. You tin remove it with a screwdriver. (If you purchase a different brand, look for a removable type.)
Step 8
Renew the smoothen
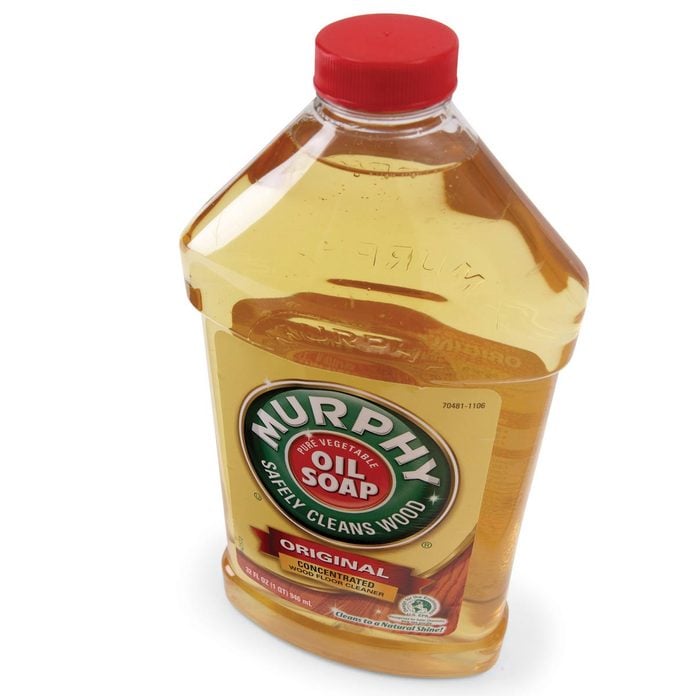
Grease splatters and smoke can leave a film on your cabinets, dulling the finish. Wash the cabinets with a wood cleaner to bring back the luster. Murphy Oil Soap is i type of cleaner.
Use a sponge to rub the cleaner onto the cabinets. Cleaners similar Spud's don't demand to be rinsed off, which cuts your cleaning time. For stubborn grease spots, scrub lightly with the cleaner using a No. 0000 steel wool pad. Cleaning the cabinets one time a year keeps them shiny and protects the finish.
Skip the shop and get this phenomenon cleaner from Amazon right hither.
Stride nine
Repair Busted Drawers
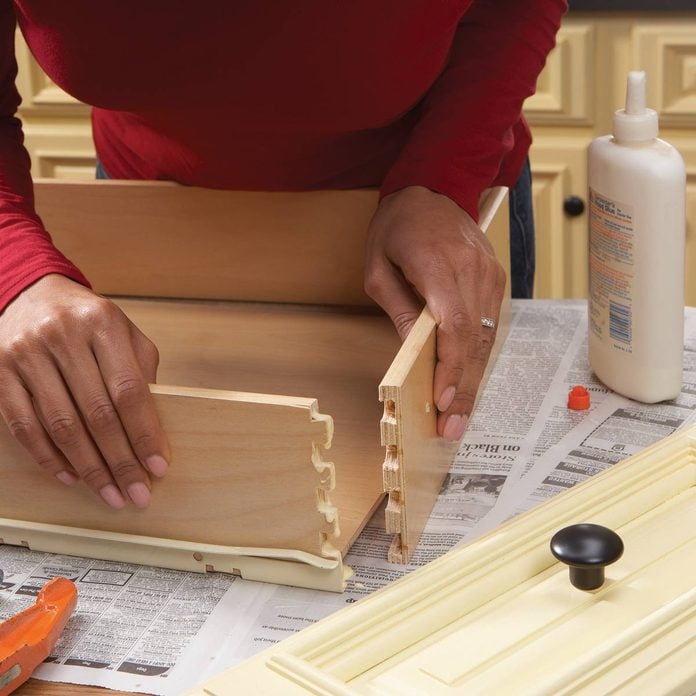
Some drawers are held together by only a few drops of glue or brusk brad nails. When you start detect a drawer corner coming autonomously, take out the drawer and fix it. And if one corner is declining, others probably will too. Relieve yourself futurity hassles by repairing all the weak corners at present. Place a slice of scrap wood against a corner and lightly rap it once with a hammer. If the corner comes apart, fix it. If not, it should concord up.
To fix the corner, showtime remove the drawer front, if possible. About fronts are attached by screws driven from within the drawer. Remove any fasteners from the corner, so scrape away the old glue with a utility knife. Reglue the corner, tap the sides back together and clamp the drawer until the gum dries.
Footstep x
Repair a broken drawer front
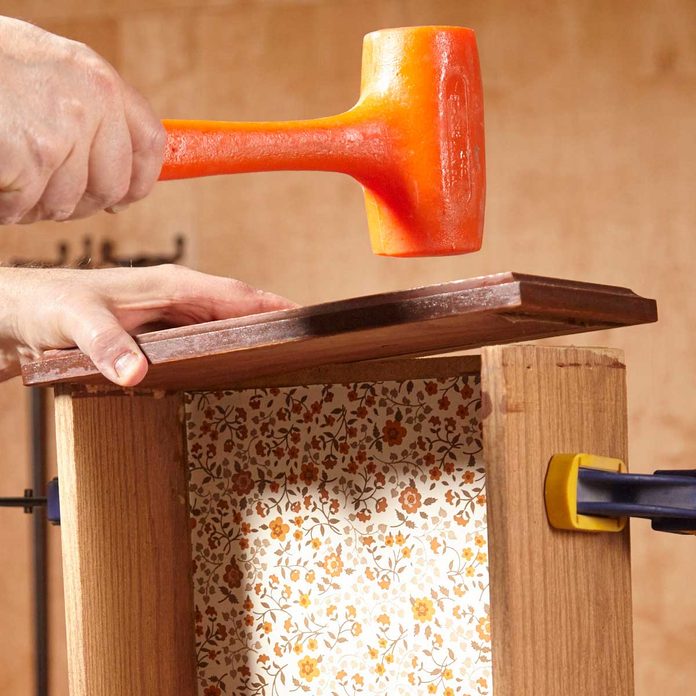
Photo 1: Reinstall the drawer front
Remove the drawer pull and screws. Then line upward the mortise-and-tenons and the drawer lesser with the groove and tap the drawer front back onto the box.
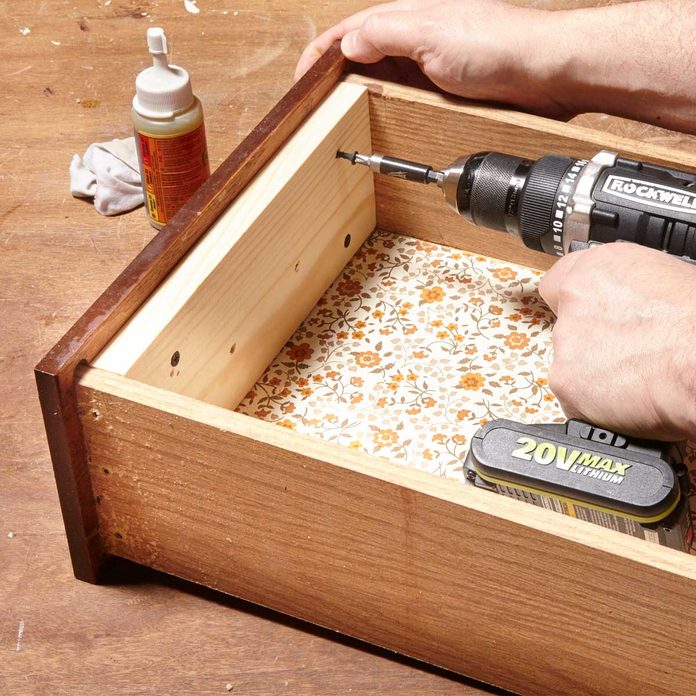
Photo 2: Reinforce the drawer front
Drill four one/8-in. pilot holes through the newly installed box front. Then bulldoze fibroid-thread drywall screws through the new box front and into the sometime drawer front.
High-quality chiffonier drawers are congenital with a sturdy box and a separate decorative drawer forepart. But the drawer fronts on economic system cabinets are part of the box itself. They're fastened to the sides and bottom with a mortise-and-tenon articulation and held with mucilage and staples. Repeated openings and closings break the joint and the drawer front falls off. You tin try regluing the joint, but it won't last. Here's how to prepare the trouble permanently.
Cut a three/four-in.-thick piece of wood to match the width and height of the drawer box. Then remove the staples from the tenons and clean upward the rough edges then you can reinstall the drawer front (Photo ane). Glue the new wood block directly behind the drawer front (use polyurethane glue if the box sides and lesser have been varnished). Secure with nails or screws. Then attach the one-time drawer front to the new forest block (Photo 2).
Using the one-time drawer pull holes as a guide, drill through the new wood cake. Buy longer No. 8-32 x 1-iii/4-in. auto screws and remount the drawer pull.
Step xi
Add Back Plates to Comprehend Worn Areas
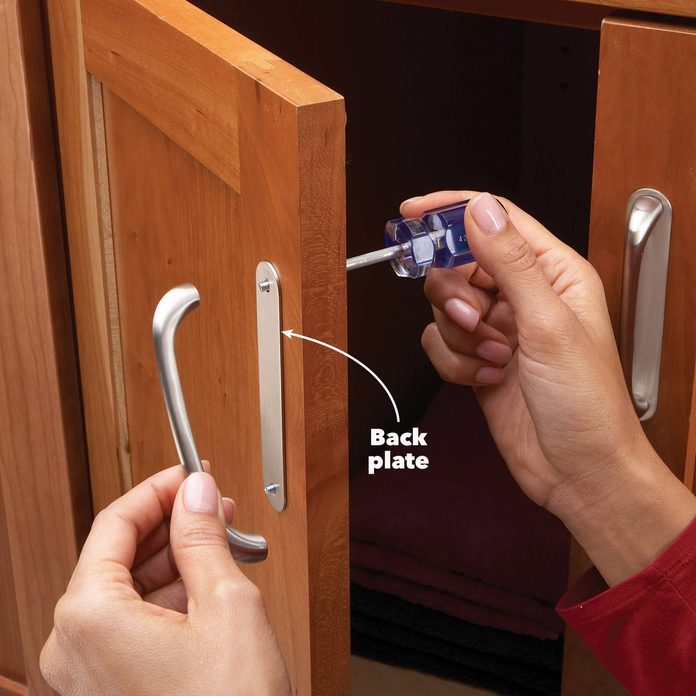
Years of opening doors and drawers tin wear away the finish almost cabinet knobs. Instead of undertaking the time-consuming task of refinishing the cabinets, effort this quick gear up: Install back plates nether the knobs or handles. Just unscrew the knob or handle, slide the back plate nether it, and then reattach the knob or handle. Dorsum plates are inexpensive and are available in a wide range of styles. You can special-club them at dwelling centers or purchase them online.
Step 12
Replace Bad Latches
Older cabinets sometimes have "roller catches" that agree the doors closed. If you have these and your door won't close or stay closed, loosen the screws to slide the catch forrard or backward on the chiffonier frame. Or replace it if it's broken. The catches are available at home centers.
Stride 13
Make full in Scratches
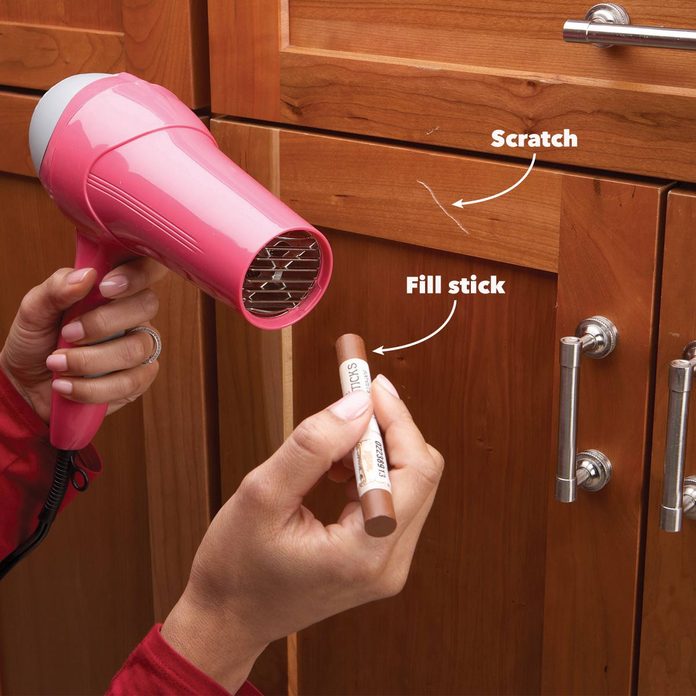
Apply a wood fill stick to brand scratches less visible. The stick fills in and colors over the scratch. Soften the stick with a hair dryer to make the application easier. And then run the stick over the scratch and wipe away any excess with a cloth. The fill probably won't be an exact match with the surrounding chiffonier, only information technology'll exist close. The sticks piece of work on shallow and deep scratches. They're available at habitation centers and hardware stores.
Stride 14
Lubricate Sticking Drawers
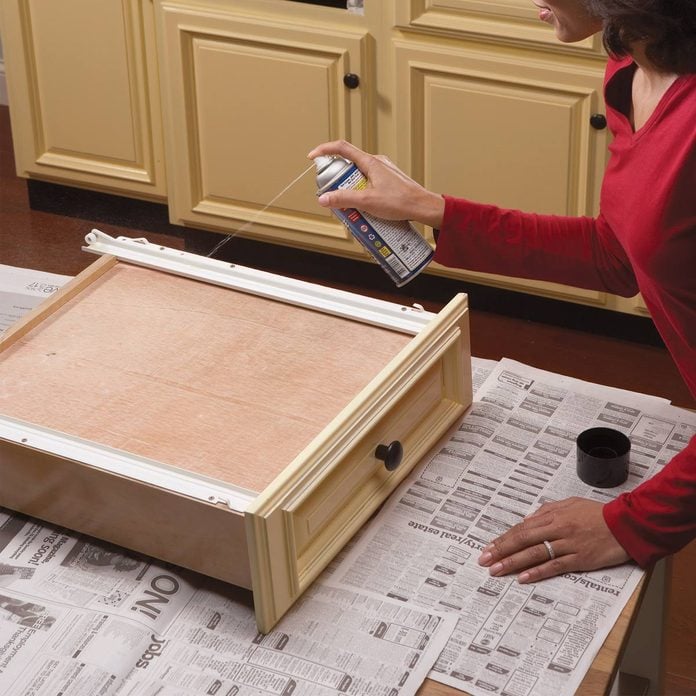
The fix for sticking drawers is piece of cake. Beginning remove the drawer. Wipe the drawer slides and the cabinet track with a clean cloth to remove any debris. So spray a dry lubricant straight on the drawer slides. Cans are sold at home centers; it'll say "dry lubricant" on the characterization. Supersede the drawer and slide information technology in and out of the cabinet several times until it glides hands. If the drawer is withal hard to open up, supervene upon the drawer slides.
Dry lubricants won't leave an oily residue that attracts dirt and dust. The lubricants also work smashing on squeaky hinges.
Step xv
Pull Doors Shut with Magnets
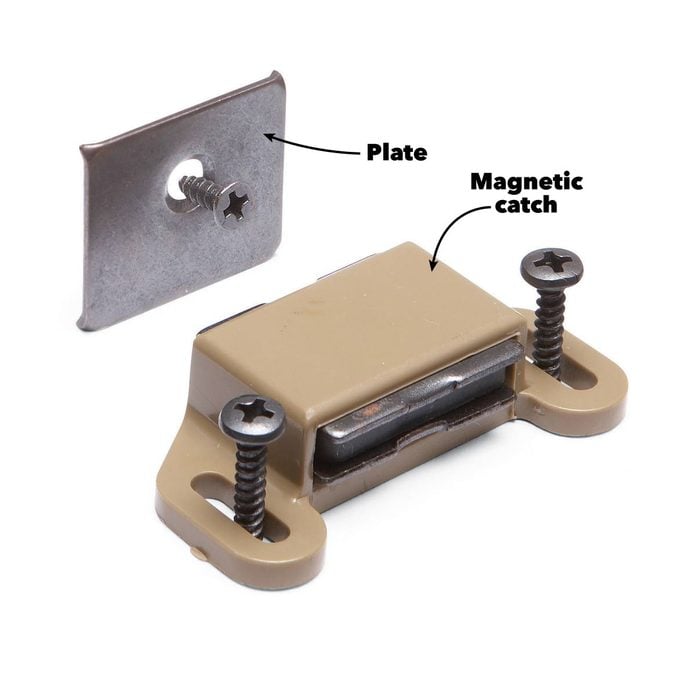
Certain, this trick is as old as Benny Hill jokes, but information technology withal works. When your cabinet door is warped and won't fully shut, simply install a magnetic catch (sold at home centers) at the problem area. Screw the magnetic catch to the chiffonier rail or stile and the plate to the door. The magnet pulls the door closed.

Source: https://www.familyhandyman.com/project/home-repair-how-to-fix-kitchen-cabinets/
Posted by: goodmanwhentom1964.blogspot.com
0 Response to "How To Repair A Cabinet Coming Away From The Wall"
Post a Comment